How to Create and Share a Public Playlist
This guide walks you through creating a playlist in Crates Desktop app (MacOS and Windows) and publishing it so others can discover and listen to it.
(Creating a playlist through mobile apps is not supported yet:/)
1. Create a Playlist
You can create a playlist anywhere in your library, but a Playlists crate is a good place to start.
- Right-click on Playlists (or any folder)
- Click Add New → Playlist
- Give it a name (you can change it later)
2. Add Music to Your Playlist
You can add tunes in multiple ways:
- Right-click on the playlist → Import files or folders
- Drag and drop files into Crates
- Use the browser extension to import from online sources (Bandcamp, YouTube, SoundCloud, etc.)
- Drag and drop or copy-paste supported links directly into Crates
- Use Online Search to search for tracks online
A useful tip is to open the playlist in the right side panel: right-click → Open in side panel. This makes it easier to drag and drop tracks from the main panel while browsing your library.
You can then use Search, or right-click a tune and select Add to… the playlist. This sub-menu contains the playlists open in the right side panel.
3. Organize and Edit
- Reorder tracks via drag and drop
- Right-click a track → Edit to update metadata (genre, title, artist, album, year, etc.)
- Use the Get Info action to automatically fetch metadata from connected sources
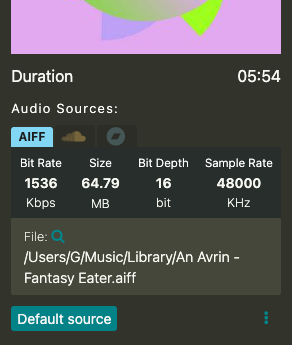
4. Add Audio Sources (Important)
For others to listen to your playlist, each track needs a public audio source.
- Crates will try to auto-find sources when publishing
- If it does not find a public audio source for a track, you’ll be prompted to add one
You can also add sources manually in advance:
- Invoke the Find Audio Source action: right-click a track → Actions → Find audio source
- Open Edit → check the Audio Sources section
- Drag and drop a supported URL directly into Audio Sources
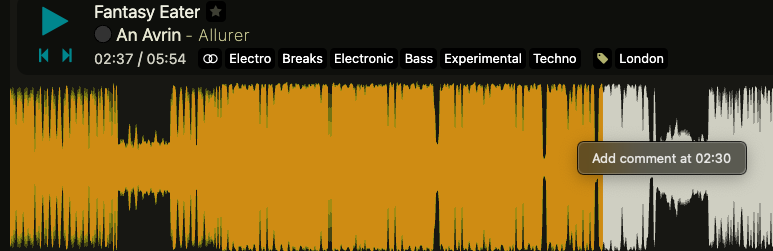
5. Add Timestamped Comments (Optional)
- Right-click on the waveform area at the time you want the comment to appear → Add comment
- To add a link, highlight the text and click the link icon, then enter the URL
- Each comment appears as an icon on the waveform
- Right-click a comment to edit or remove it
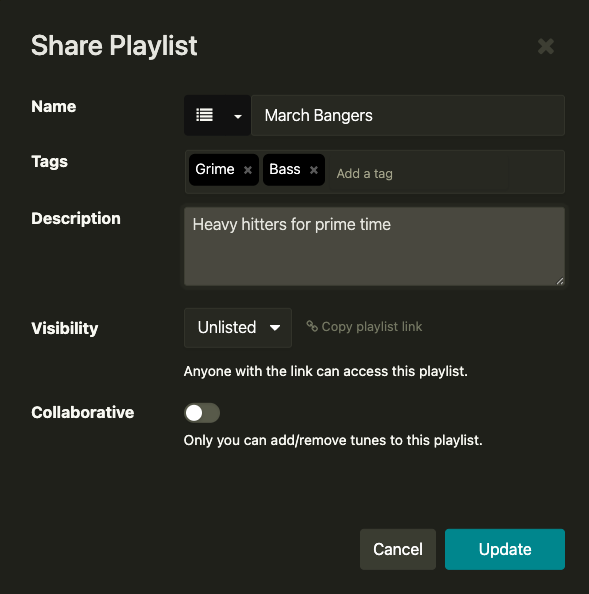
6. Share Your Playlist
- Click Share playlist
- Review the title, description, and tags (used for discoverability)
- Tip: Start with Unlisted first if you want to test before the playlist appears on the crates.app/playlists page.
- Click Share
Your playlist is now published on Crates.app and can be discovered by other users in their Crates installation.
7. Update Your Playlist
You can update your playlist anytime:
- Change the order of tracks, add or remove tracks, update metadata or comments
- Click Share again → Update
Notes
- Publishing sends your playlist data to Crates servers so others can discover it
- Tracks without valid audio sources won’t be playable by others, but they can search for a public audio source themselves based on the track’s metadata
- Advanced: It is recommended to populate the ISRC of a tune to improve discoverability. The ISRC is the unique identifier of the track across streaming platforms. A useful way to do this is to pull metadata through the Get Info action, after connecting as many sources as possible.